Halloween Pumpkin Face Painting Tutorial
A classic, bright orange Jack-o'-lantern for Halloween.
The classic Jack-o'-lantern is a Halloween staple. It is incredibly fast, uses bright colors that kids love, and can be easily customized with different silly or scary faces.
Tutorial Overview
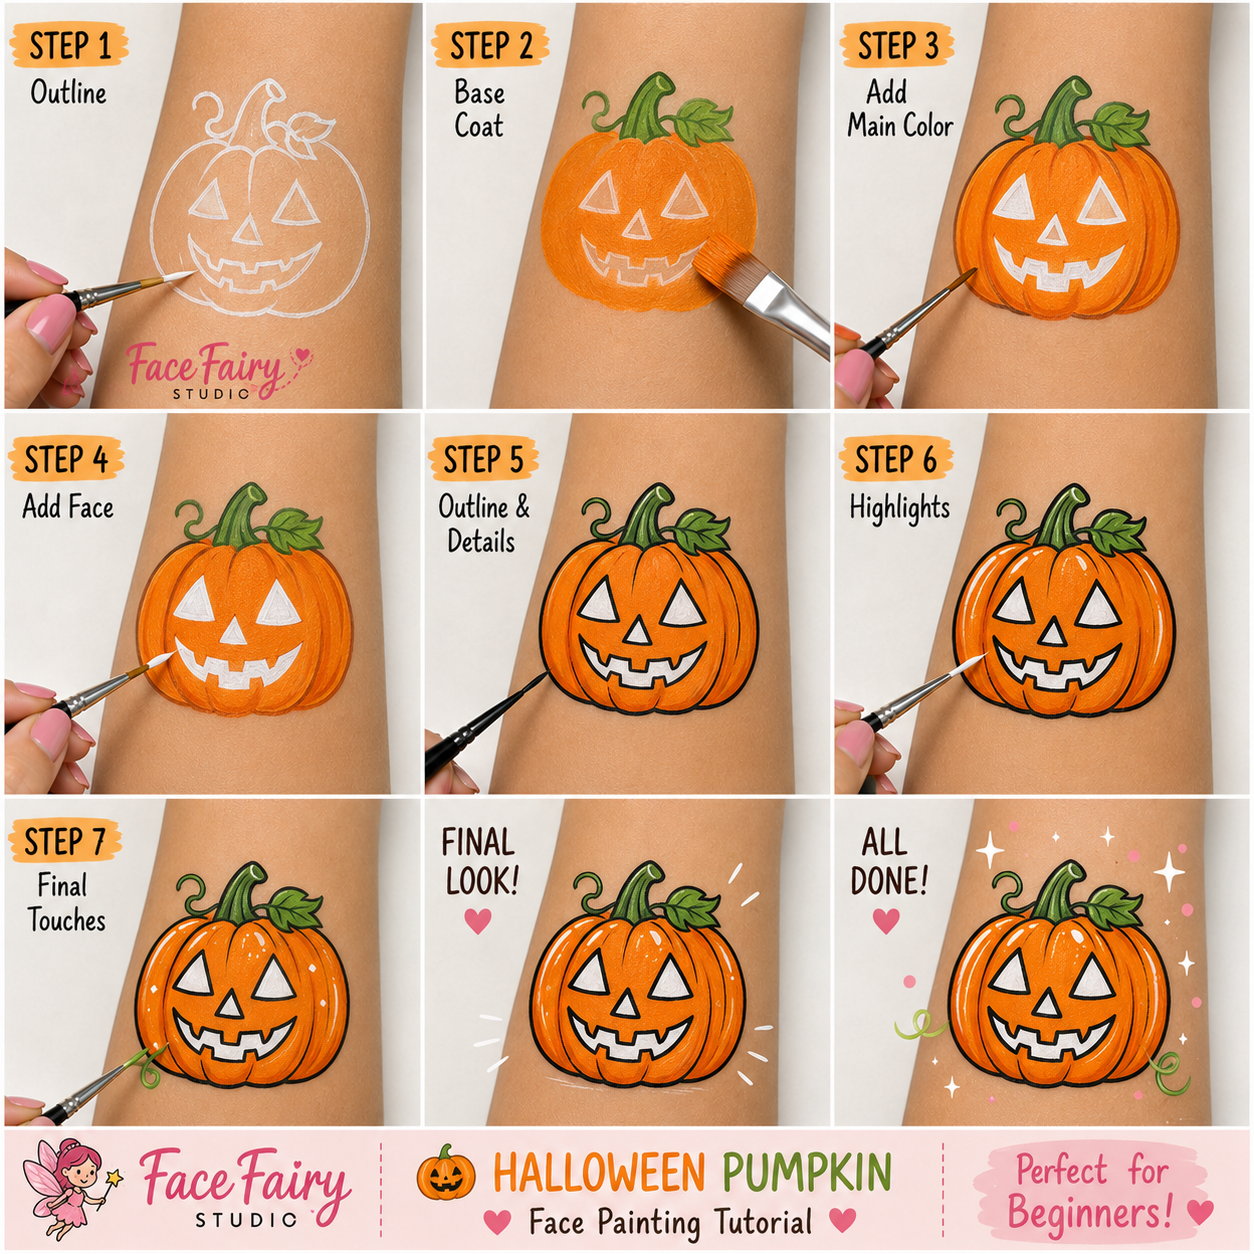
Step-by-Step Instructions
Sponge the Base
Using a sponge, create a large round orange circle on the cheek or forehead.
Add Highlights
Sponge a little bit of yellow in the center of the orange circle to give the pumpkin a glowing, 3D effect.
Paint the Stem
Using a round brush, paint a small green rectangular stem at the top center of the pumpkin.
Draw the Outline
With black paint and a fine brush, outline the pumpkin and add curved vertical lines to create the pumpkin's ridges.
Paint the Face
Paint two black triangles for eyes, a small triangle for a nose, and a classic jagged mouth.
Add Vines
Use your green paint to add a few curly vines extending from the stem.
Final Sparkle
Finish with white highlight lines along the left side of the ridges to make the design pop.
Safety & Skin Care
- Always use professional, cosmetic-grade, water-activated face paints.
Design Information
- Round brush #3
- Flat brush #6
- Sponge
Available for parties across the Triangle.