Tiger Face Painting Tutorial
Bold tiger with classic black stripe markings and fierce-but-cute expression.
The tiger is an iconic face paint design that relies on strong, confident line work. By focusing on symmetrical stripes and a clean orange base, you can create a fierce-but-cute tiger very quickly.
Tutorial Overview
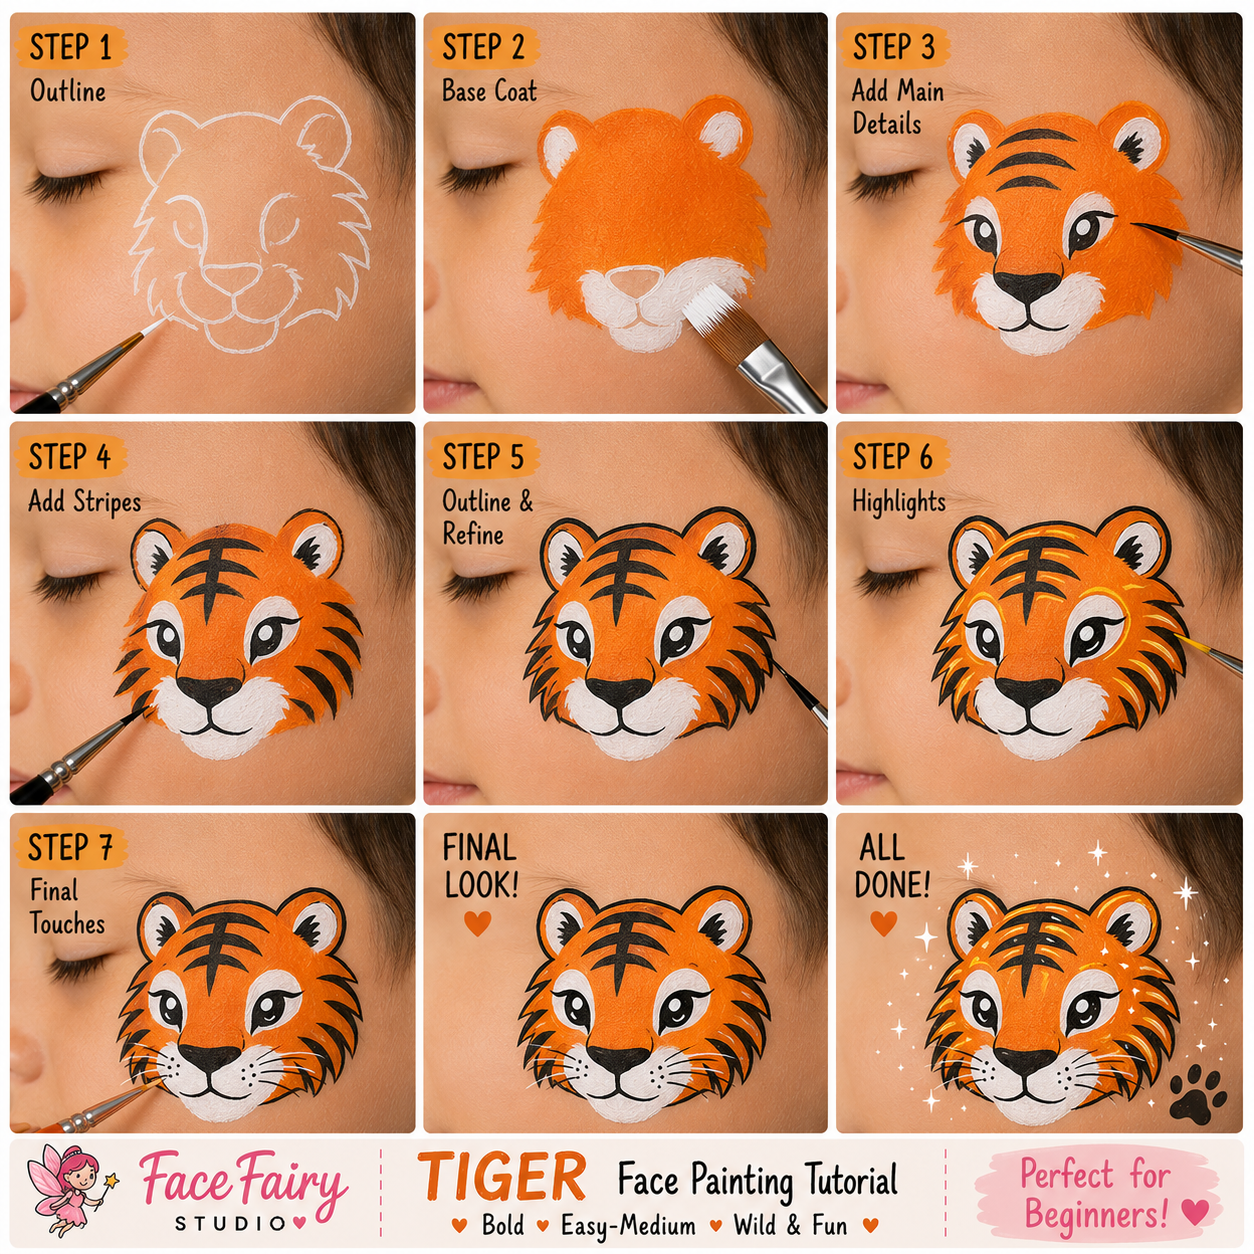
Step-by-Step Instructions
Sponge the Base
Using a sponge, create a vibrant orange base across the cheek or forehead area.
Add the Muzzle and Eyes
Sponge white paint onto the lower half of the base for the muzzle, and add white patches above the eyebrows.
Paint the Nose
Using black paint, paint a small heart-shaped nose in the center of the muzzle.
Draw the Center Stripes
With your round brush and black paint, draw 3 horizontal stripes pointing down towards the nose from the center of the forehead.
Draw the Cheek Stripes
Add 3 slightly curved stripes on each cheek, starting thick at the outer edge and tapering to a fine point towards the center of the face.
Add Outline and Mouth
Outline the muzzle area in black, draw the upper lip line down from the nose, and add some whisker dots.
Final Touches
Add a few thin yellow highlight lines next to your black stripes to make the design pop, and add a tiny paw print accent.
Safety & Skin Care
- Always use professional, cosmetic-grade, water-activated face paints.
Design Information
- Round brush #4 (for stripes)
- Flat brush #6
- Sponge
Available for parties across the Triangle.